Three Easy Ways To Upgrade From Windows XP To Windows 7

From Windows XP To Windows 7
If your customers are like most companies, they're either running Windows 7 already or figuring out ways to migrate from Windows XP to Windows 7. Unfortunately, Microsoft offers no direct path for this, but some of the tools it made for Vista-to-Windows 7 migration can be useful in the XP-to-7 update process.
This presentation will cover the two main paths to update Windows XP to Windows 7: moving from an XP machine to a different system that already has Windows 7 installed, and upgrading a single system from Windows XP to Windows 7. In either case, the first few steps are the same. When the paths divide, we'll prompt you to skip ahead for the path that applies to you.
Also included is a third way, which provides (at a cost) the quickest and simplest migration of all, and results in a Windows 7 machine that runs all of the XP machine's apps and data virtually. To see that solution now, skip to slide 10. Otherwise, here we go into the Windows 7 yonder.
Easy Transfer Wizard
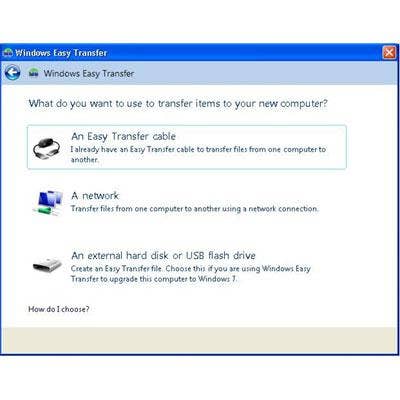
The first step is to download and launch Microsoft's Windows Easy Transfer, a free tool that runs on the old XP machine to backup data and settings and then runs on the Windows 7 machine to restore them. WET is available for 32- and 64-bit versions of Windows XP and Vista; it comes pre-installed on Windows 7. After the splash screen, WET presents destination choices for storing the old machine's user data. We saved everything to an external USB drive.
Grab All User Profiles
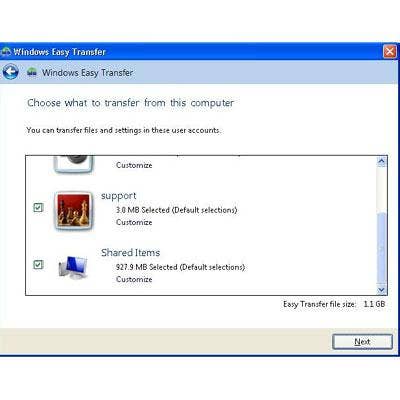
If a network (or LapLink-style transfer cable) is present and you're migrating to a system with Windows 7 already installed, this faster option allows the data to be saved directly to the new system (using WET as the conduit). We chose to save data to an external USB drive for an added measure of security. We also accepted the default setting to allow WET to transfer all data from all user profiles; they can always be deleted later. For user(s) that no longer exist, deselect their check box(es) before beginning the transfer.
If you're migrating to a machine with Windows 7 pre-installed, skip to slide 7.
Starting At The End
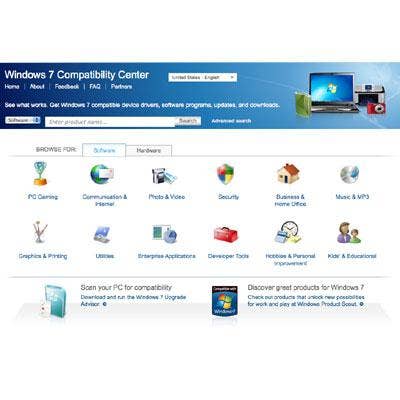
If your plan is to install Windows 7 onto the same machine that was running XP, it's probably a good idea know in advance if it's powerful enough. As a baseline, we recommend at least an Intel Core 2 processor (or AMD 64-bit dual-core equivalent) and 4 GB of memory. A Core 2 or later processor also will allow for virtualization. Microsoft recommends a visit to its Compatibility Center for guidance on app compatibility and links to hardware drivers and to the Upgrade Advisor utility, which scans the hardware for Windows 7 compatibility.
Clean Windows 7 Install
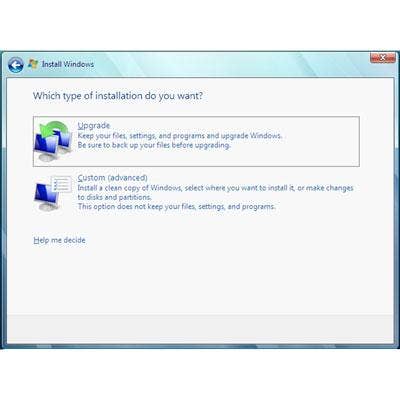
Once you've determined that the target machine has enough horsepower to run Windows 7, you'll need to wipe the hard drive and install Windows 7 from scratch. Before booting the Windows 7 installation disc, we advise writing down the make and model numbers of display and networking hardware before wiping the hard drive, just in case they're missed by the Windows 7 installation routines. Once inside the Windows 7 installation disc, be sure to select "Custom Install," because any attempts to "Upgrade" will fail (trust us on this).
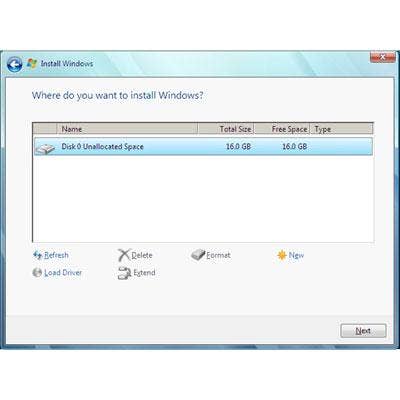
Wipe The Hard Drive
Swallow hard and format the hard drive, secure in the knowledge that your user data, profiles, settings and passwords have been saved (we also created a complete back of the XP's hard drive just in case). The Windows 7 installation process is fairly automatic from here on, as it installs files, asks for some information, restarts a time or two and then launches a pristine Windows 7 operating system.
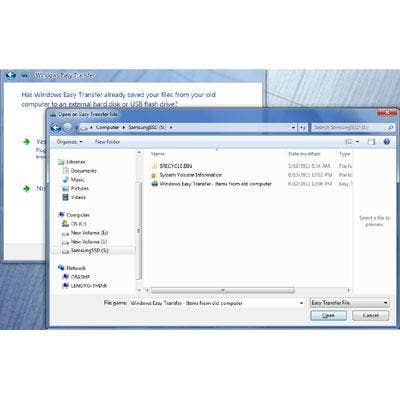
On Win7 Target
If you're migrating user data and profiles from a USB drive, plug the drive in to the (Windows 7) target machine now. To transfer the profiles from the USB drive to the Windows 7 machine, go to Start Menu > All Programs > Accessories > System Tools > to find and launch Windows Easy Transfer. Navigate to the USB drive, where the stored profile data file will be called something similar to "Items from old computer."
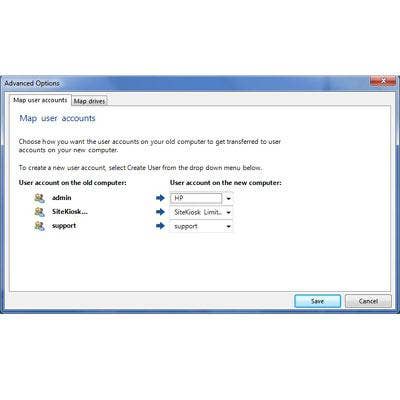
Profile Profiles
After you open the profile data file, select "Advanced Options." Here, the tool affords some control over how the incoming profiles and hard drive(s) will be mapped relative to the machine's existing profile, if any. These settings will be less relevant for clean-installed machines than for Windows 7 targets that had been used previously and contain one or more drives and users. Make appropriate changes and hit Save to proceed.
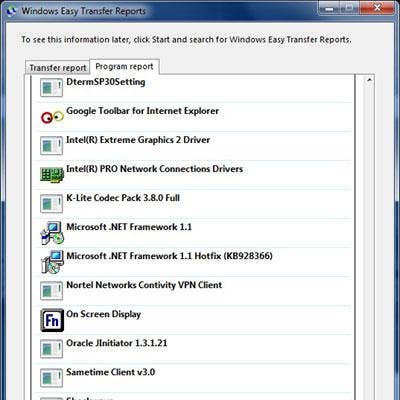
Practically Useless
After the transfer completes and any file errors are cleared, Windows Easy Transfer presents a list of the applications that were present on the XP machine that need to be reinstalled under Windows 7. Unfortunately, this includes them all, even a few Microsoft's own such as Media Player that might come along with Windows 7. In other words, this list is practically useless.
In our experience, it's best to reinstall applications from their original media (CD, DVD, internet, etc.) as needed. To avoid all that and migrate from Windows XP to Windows 7 in three easy steps (not including a step in which someone pays $89), then please click next.
Virtually Seamless
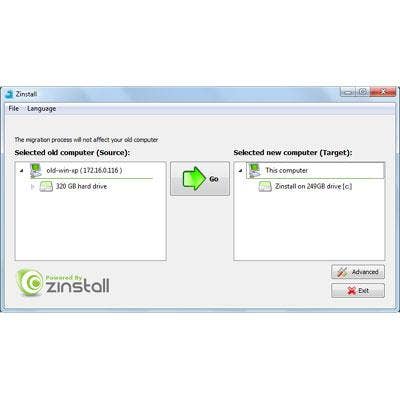
Filling the migration breach left open by Microsoft is XP7 from Zinstall. In our tests of XP7 version 2.6 in February, the automatic migration tool not only flawlessly moved all the data from an XP laptop to an existing Windows 7 machine, it also virtualized the laptop's network connections, giving the target machine access to resources it could not previously use.
To use the tool, simply launch it on source machine and follow the prompts, which include queries about source and destination machines (which can be the same). If you're moving from one machine to another, it lists available connection methods and continues to instruct the user on procedures for both machines.

Do No Harm
The non-destructive tool simply moves data from the source computer (running XP) to the target (Windows 7) machine, which uses the data to implement an XP virtual machine. The tool overtakes both machines, preventing any access during the transfer process. However, an informative and accurate status screen is displayed on both ends to keep you aware of what's happening. Advanced options include password protection, file filtering and the ability to drill into source and target volumes. The entire process should take about 30 minutes.
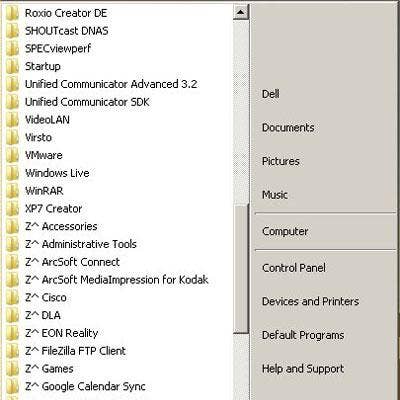
Virtual Apps
When all is said and done, the Windows 7 machine's start menu is populated with applications from the XP machine preceded by a "Z^" to indicate they will be running inside a virtual instance of Windows XP. When speed and simplicity are the orders of the day, the $89 Zinstall XP7 is worth a serious look.
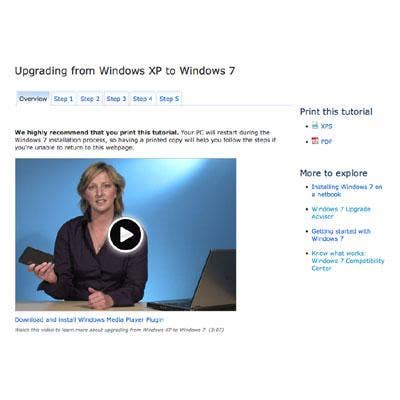
The Microsoft Way
Performing upgrades like this can involve hundreds of variables, including migration of DRM protected content, moving from 32-bit Windows XP to 64-bit Windows 7, restoring file rights and privileges, and on and on. For those situations, Microsoft documents the entire process of migrating from Windows XP to Windows 7 on its Web site, which includes copious screen shots and lengthy explanations throughout.