10 Great Features Of Symantec Backup Exec 2012 For The Cloud
Symantec Backup Exec 2012
Backing up to the cloud is about to get a whole lot easier thanks to Symantec. On Monday the company will officially unveil Backup Exec 2012, which now includes modules for simple off-premise cloud backup and for backing up 100 percent virtualized environments.
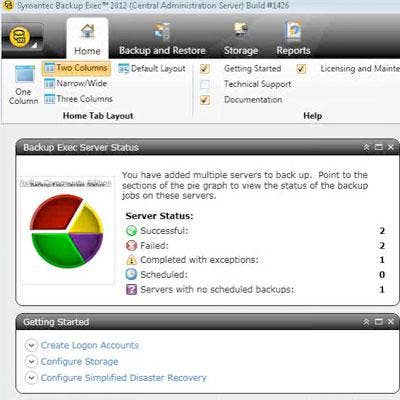
Backup Exec 2012 is built around an entirely new user interface that is worlds away from its predecessor in ease of use. Given early access, the CRN Test Center looked at a final release candidate and offers you a guided tour. Shown here is the Backup Exec 2012 home page, which scraps the left-hand task pane for a layout that's easily customizable into one, two or three columns, or into a narrow/wide style. Major functions are reduced from seven into four tabs (shown) and are presented in rounded tiles that can be placed anywhere in the layout and expanded or contracted as needed. This so-called resource-centric model is consistent throughout the program.
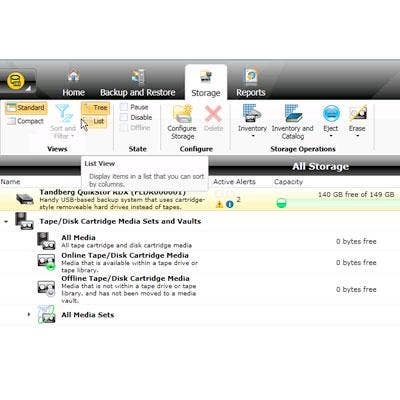
Storage Tab
What used to be views for media, media server and devices has been replaced in Backup Exec 2012 by the Storage tab, a single place to monitor and manage ongoing backups and to create new ones. Commands available in the Storage tab are shown in the ribbon along the top edge and include views, state and configure (shown next). All global commands shown in ribbons also are available in Backup Exec 2012 menus.
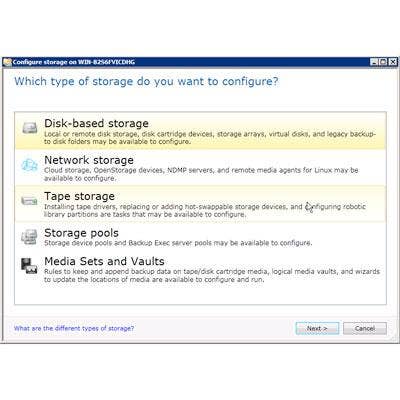
Select Storage Type
Part of the simplified nature of Backup Exec 2012 is its creation of storage. If a backup is attempted before any storage has been created, the application prompts as such and presents the corresponding link. The first step is to select the general storage type from this list of disk-, network-, cloud- and tape-based media, as well as from existing storage pools and media sets or vaults.
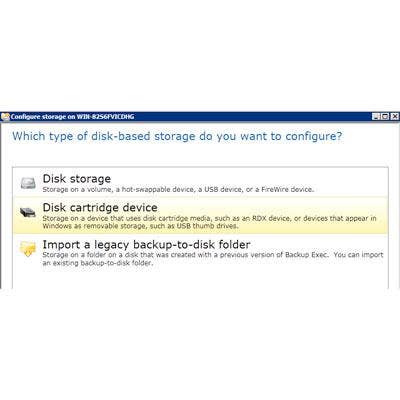
Configure Storage
Once the storage type is selected, a list of available media of that type is shown from a list that's updated dynamically. When we initially launched Backup Exec 2012 for our tests, there were just disk storage and import options available. The disk cartridge option (shown highlighted) appeared after we added a Tandberg QuikStor RDX backup drive to the host system.
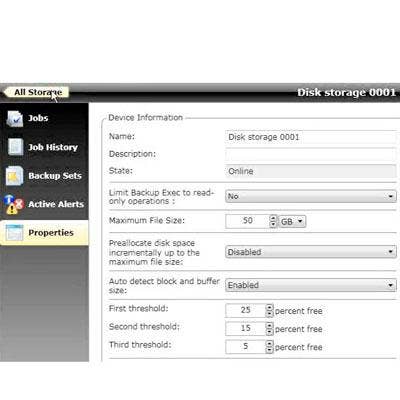
Storage Device Info
Once a storage device is created, its information can be easily accessed and edited by drilling into its icon in the storage devices view. In addition to modifying device name, state and write characteristics, administrators also can edit its logical path and thresholds that correspond to warnings about its capacity. This screen also presents a simple interface for viewing the storage medium's current and past jobs, backup sets and active alerts.

Create A Backup
Replacing the Job Setup and Job Monitor views is the Backup and Restore tab. Its features include a simple point-and-click interface for creating new backup jobs from this list of common scenarios, including those involving a deduplication server. The highlighted scenario shown creates a process that first backs up to disk and then copies the backup to tape. What's really nice is the interface for editing these scenarios, shown next.
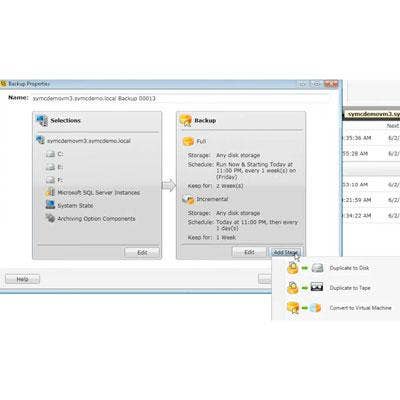
Edit Backup Scenario
Once a backup scenario is created, its default settings are displayed on a screen similar to the one shown here. At left are the sources and at right are the destinations, each with an Edit button for modifying their settings. To add a stage to a new or existing scenario, the administrator has simply to click the Add Stage button to bring up a list of available stages. This capability might come into play when, for example, a new backup device or deduplication server is added to an existing system. Rather than creating new backup scenarios, the device or server can be added to the desired scenario(s) as an additional stage.
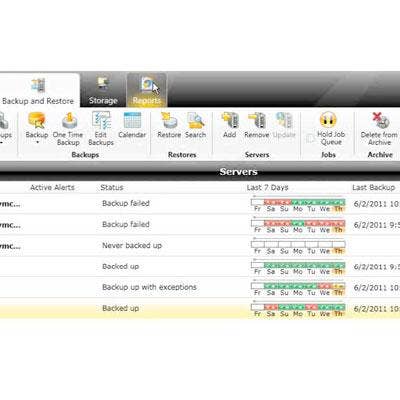
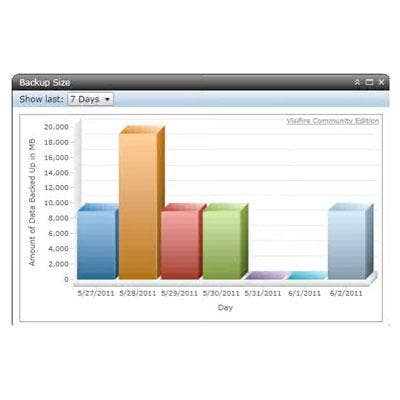
Listing All Servers
The Backup and Restore view lists all servers (as well as SharePoint farms and other distributed applications), giving administrators an at-a-glance color-coded view of the backup status for one week of all systems being serviced. Yellow indicates nonfatal warnings; failures are in red. Drilling into any of these indicators brings up the backup log and additional information about that particular day's backup job. Drilling into a specific server shows details about specific jobs, full and incremental backup history, alerts and other details.
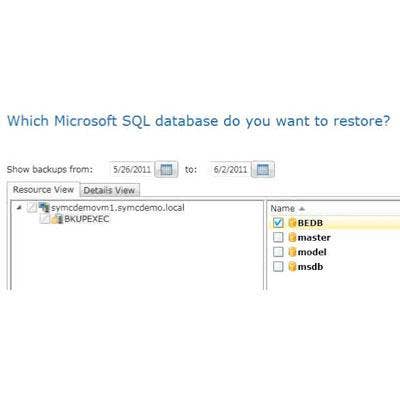
Automatic Restoration
It's obvious that Symantec put tremendous effort into simplifying the restoration process, particularly for specific types of application data. The Restore wizard presents for selection only the types of data that have previously backed up on that server. And if restoring Microsoft SQL Server databases, for example, Backup Exec 2012 offers to restore only databases that have been backed up. Additional restore options are presented in accordance with the type of data being restored to help administrators zero in on the correct data.
Superior Interface
Users of prior versions of Backup Exec will find scant few UI similarities to Backup Exec 2012, and that's a good thing. The new version presents a greatly simplified experience and provides easier access to its power and capabilities than ever before. Pricing also is simple. For small businesses with primarily physical or mixed physical and virtual environments, Backup Exec 2012 pricing starts at $995 per server. For completely virtual environments, the new V-Ray Edition starts at $1,695 per hypervisor socket. General availability is set for midyear.